Feature flags with strategy constraints [Updated with note, 2023]
Note: This article was written during Unleash’s earlier days. A lot of the content below doesn’t really apply to the current version of Unleash.
Use our documentation for more up-to-date technical how-to content.
For getting started with building feature flags, refer to this page in our documentation instead.
Feature flags with strategy constraints enables a new set of working efficiently with feature flags in a developer workflow. A typical use case for Strategy constraints is that you want a feature flag enabled for everyone in QA but only for a limited set of users in production. So far there have been different workarounds to enable this; Some users have used custom strategies to control rollout in different environments. We have also seen a pattern of prefixing the name of the feature flag with the name of the environment.
How to get started for with feature flags?
1. Upgrade client SDK
The first thing you need to do is to make sure you have the correct client SDK. We have implemented support in the following clients, make sure you are using the correct version:
- unleash-client-node – from v3.2.8
- unleash-client-java – from v3.2.8
- unleash-client-python – from v3.0.0
- unleash-client-go – v3 branch
(we are working on adding support in Ruby and .Net client as well)
2. Configure client SDK
In order to start using environment constraints, you will need to specify which environment your application is currently in as part of the initialization of the unleash client. This is done by specifying the “environment” configuration options. Remember to also set up an environment for local development. For further details, please go to our “Getting Started” section.
Java:
UnleashConfig unleashConfig = UnleashConfig.builder()
.appName("my.java-app")
.instanceId("your-instance-1")
.environment(System.getenv("APP_ENV"))
.unleashAPI("")
.customHttpHeader("Authorization", "")
.build();

Unleash unleash = new DefaultUnleash(config);
Node.js:
const unleash = require('unleash-client');
unleash.initialize({
url: '',
appName: 'my-node-name',
instanceId: 'my-unique-instance-id',
environment: process.env.APP_ENV,
customHeaders: {'Authorization': ''}
});
3. Start using it
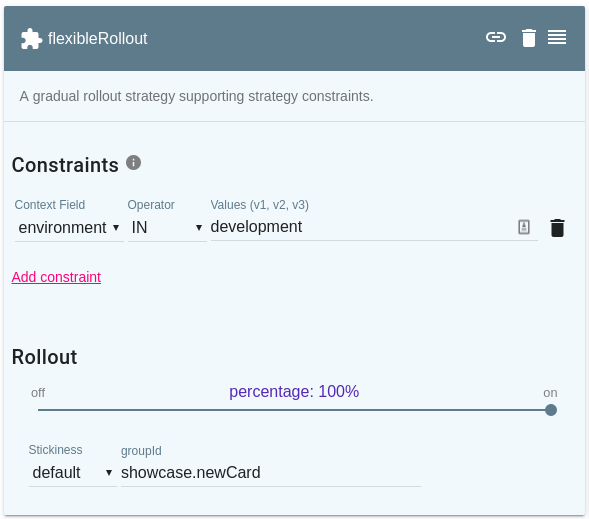
When you create an activation strategy for your feature flag, it will contain a section “Constraints”, as seen in the example below.

As shown in the figure you can define which environment this strategy applies to. If not all the strategy constraints are not met, this strategy will not be used.
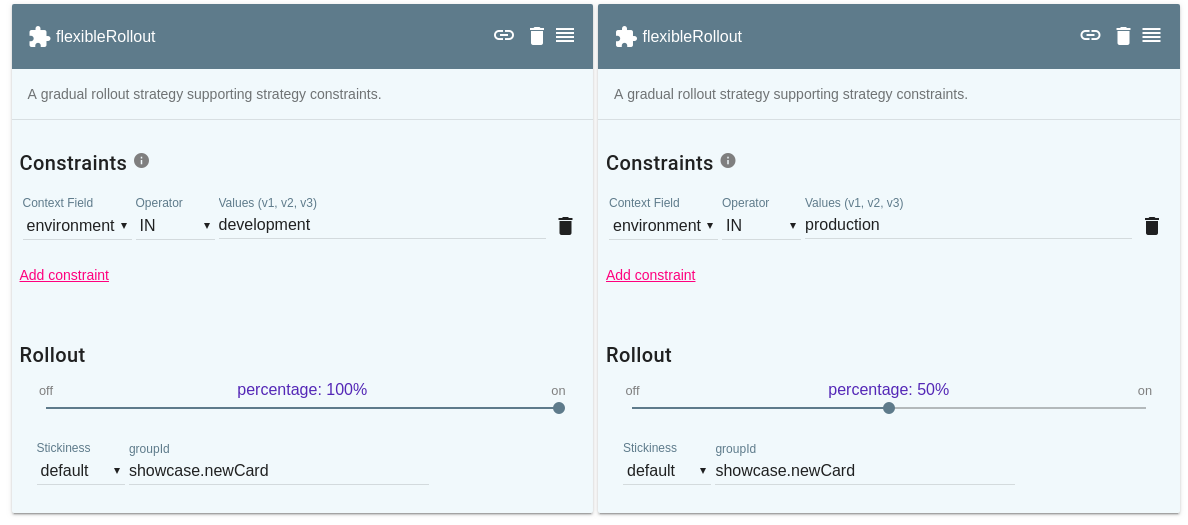
As you probably know you can define multiple activation strategies together to increase the exposure, and they are logically ORed together. By combining this with strategy constraints, you are now able to constrain a strategy configuration to only be applied in certain cases, such as an environment. This enables you to configure different rollouts per environment.
 In the example above we combine “100% rollout in development” with “50% rollout in production” and no custom, strategy is needed to solve this!
Constrain on other things?
Even though it is nice to be able to control different rollouts per environment, you might also want to constrain on other things as well. We call these custom context fields, and you can configure your instance with any context field that makes sense for you.
Some examples our customers use in production today:
- country
- tenantId (or customerId, companyId).
Combining this with the environment and the flexible rollout make you in control of how you activate features in your context.
An example of what we can achieve with this:
environment IN "prod" AND country IN "Norway" AND rollout=50%
All this is possible without any custom activation strategy.
Want to get started?
| GET STARTED | TRY OUR DEMO |